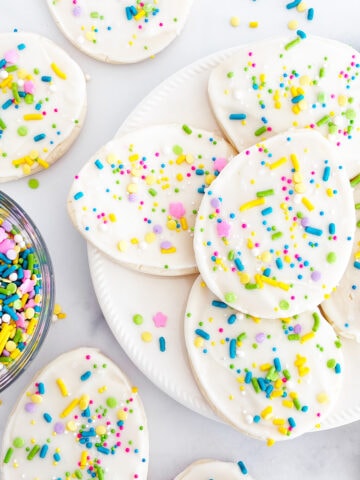
Royal Icing Carrots – delicious royal icing piped into adorable carrot transfers; perfect for decorating your Easter treats.

This post may contain affiliate links. As an Amazon Associate, I earn from qualifying purchases. Please see my disclosure policy for more on affiliate links and my policies.
I can’t believe Easter is a week from Sunday. Easter seems SO early this year. It snuck up on me between the Little Mermaid Cake, Frozen Cake, and St. Patrick’s Day. I don’t have nearly enough time to share all my Easter treats. Sigh. I guess there is always next year!
Today, I will be sharing a quick recipe and a video tutorial for Royal Icing Carrots. These adorable little bits of sugar are perfect for decorating your Easter treats. They’re also great for decorating carrot cupcakes, carrot cakes, carrot bars, and anything you feel like decorating with little sugar carrots.
To make these too cute royal icing transfers you’ll need your favorite royal icing recipe. I am sharing a solid, tried, and true royal icing recipe below that you’ll want to try. You’ll also need food coloring to color your royal icing. I am partial to Americolor Soft Gel Paste.
Royal Icing Carrots Table of Contents

My royal icing recipe is the original recipe halved and it still makes a walloping amount of royal icing for these carrots. You could half the recipe, make a ton of royal icing carrot transfers, or also make Royal Icing Pumpkins or Royal Icing Eyes. Another option is to visit The Bearfoot Baker; she has a great collection of royal icing transfers.
Supplies for Royal Icing Carrots
- Royal Icing
- Americolor Soft Gel Paste – Leaf Green
- Americolor Soft Gel Paste – Orange
- Pastry Bags
- Decorating Tip #2, Round Tip
If you don’t have pastry bags or decorating tips you could snip the corner off of a plastic sandwich bag. I’ve never done it this way, but you’ll want to make sure the corner you snip is small. You’ll have less control of your piping with this method.

To create your Royal Icing Carrots I’ve provided step-by-step instructions and a video tutorial.
Step-by-Step Directions for Royal Icing Carrots
Step 1 | The Carrot
You're going to pipe your Royal Icing Carrots onto parchment paper. I attached my parchment paper to a baking sheet with a little tape so I could move them. A boatload of little carrots takes up space that I do not have in my bake studio.
I piped the carrot using decorating tip #2, a round tip. Making Royal Icing Carrots is not an exact science. I did a zigzag motion with some and a swirling motion with others. The zigzag method gave me wider carrots, while the swirling motion narrow carrots. Either method will work; try doing some of both. They don’t look super carrot-like until you add the stem and then they’re all carrots regardless of the method.
Step 2 | The Carrot Stems
After you’ve piped all the carrot bodies you’ll be piping the carrot stems. You want the carrots to be somewhat dry before piping the stems. I found by the time I did a baking sheet full of carrot bodies, they were dry enough for the stems.
Once again I used decorating tip #2. Making the stems is even less of an exact science. I just made W’s for the stems. For the wider carrots, it was more of a zigzag. You want to do whatever looks the most carrot-like for your carrot transfers. You could also use decorating tip #14 or decorating tip #16, star tips for the stems.
Step 3 | Dry + Store
Leave your Royal Icing Carrots out for 24 hours to dry, once they have dried, store them in an airtight container. If stored properly they will last for years…maybe even forever, although I have been unable to test that theory. 😉
Now for the video tutorial…and yes, I vow to get better at video tutorials. 😉
Royal Icing Carrots Video Tutorial
What are you going to decorate with your Royal Icing Carrots?

Royal Icing Carrots
Ingredients
- 4 and ¼ cups powdered sugar
- 6 tablespoons water
- ½ teaspoon vanilla extract
- ½ teaspoon almond extract
- ½ teaspoon cream of tartar
- 2 and ½ tablespoons meringue powder
- Americolor Soft Gel Paste or Food Coloring
Instructions
- Prepare baking sheets by taping parchment paper or waxed paper to them. Set aside.
- In a large bowl using an electric mixer, beat all ingredients together until stiff peaks form; about 10 minutes.
- Divide royal icing into small bowls, one for each color. Add a drop of orange color to a bowl. Add a drop of leaf green to another bowl. Mix until royal icing is desired colors.
- Pour orange royal icing into the pastry bag with decorating tip #2 for the carrot. Apply firm pressure to your pastry bag and make a zigzag or swirl motion, releasing pressure as you get to the end of your carrot and pull the tip away.
- Using a toothpick, gently tuck orange points on carrots in.
- Allow royal icing carrots to dry for about 10-15 minutes.
- Pour green royal icing into the pastry bag with decorating tip #2 for the stem. Apply firm pressure to the pastry bag adding a W of green to the carrot, release pressure then pull the tip away.
- Allow Royal Icing Carrots to air dry for 24 hours. Enjoy!


Bel says
Hi Sarah. Thanks sooo much for replying about the cream of tartar and attaching the pumpkin tutorial. I wasn't sure how to do a pumpkin transfer, so glad you already have a tutorial for them. They're adorable. I'll be making them today for my girls to decorate cupcakes for Halloween.
Thanks.
Bel says
I really want to make pumpkins with this same recipe, could you please tell me if it's a problem if I leave out the cream of tartar?
Thanks Bel.
PS, The carrots are too cute.
Sarah says
Hi Bel! I actually have a Royal Icing Pumpkin Tutorial: https://sarahsbakestudio.com/royal-icing-pumpkins/. The recipe for the pumpkins doesn't use cream of tarter but you can leave it off of this one as well. Thanks & Happy Baking!
Claire @ The Simple, Sweet Life says
These are so cute! And would perfect for that bowl of leftover icing I've been wondering what to do with!
Sarah says
Thanks Claire! Happy to help with your leftover icing problem...as if having leftover icing is a problem. 😉
Annie @ Annie's Noms says
These are TOO cute! Although I imagine I wouldn't be able to stop eating them as they set!!
Sarah says
Thanks Annie! Taste testing while baking is always a problem! 😉
Laura@ Baking in Pyjamas says
Visiting from Treasure Box Tuesday. I love royal icing but only use it for Christmas cakes, these little carrots look wonderful and delicious too. I would love for you to stop by and share this and other recipes with us over at Sweet and Savoury Sunday. Have a great day!
Sarah says
Hi Laura. Thanks for stopping by. I will defiantly check out Sweet and Savory Sunday.
Elena says
These cute carrots look so easy to make, I will definitely give it a try!
Sarah says
Elena, they are so easy and fun! 🙂 If you make them I'd love to see a pic!
Amanda @ The Kitcheneer says
These are absolutely adorable and just in time for Easter!
Sarah says
Thanks Amanda!
Pamela @ Brooklyn Farm Girl says
These turned out so great, I want you to be my royal icing teacher! I'd love to make a cake and decorate it with these carrots!
Sarah says
Thanks Pamela. You're too sweet!
Stephanie @ Sustaining the Powers says
These are so adorable!! I didn't realize that royal icing shapes lasted forever. I thought you'd have to make new ones every year. (I usually work in chocolate which will discolor over time.) I kinda want to make a ton of shapes now and stock my baking cabinet for years to come!
Sarah says
Thanks Stephanie! I love royal icing decorations. They are fun to make, use, and they have a kick-butt shelf life. 😉 I am starting to work with chocolate a little more lately, which I also find fun. Thanks for stopping by!